Installing SD cards
How to download and install the OS image
Note
The Mainboard comes with pre-flashed SDCards, flashing the SDCards is in general not required.Introduction
The NOREYA NEXUS uses two SDCards in mirrored (RAID1) mode.
For details see the Mainboard docu.
Pre-requirements
To flash the SDCards you need:
- A microSD card compatible reader
- Two compatible SDCards of at least 64GB size
- Running the SDCards in mirrored/RAID mode requires verified SDCards. We have tested a lot and not every SDCards works in this mode.
- Using incomaptible cards may result in broken/resyncing RAID or total system failure.
- You must use two SDCards of the same size.
- You must always use two different SDCards to ensure the do not fail at the same time.
- You must only use a pair of official SDCards. We sell them as spare part in our online shop.
Replacing SD cards
- Do not use force during this procedure, otherwise the SD cards may be damaged!
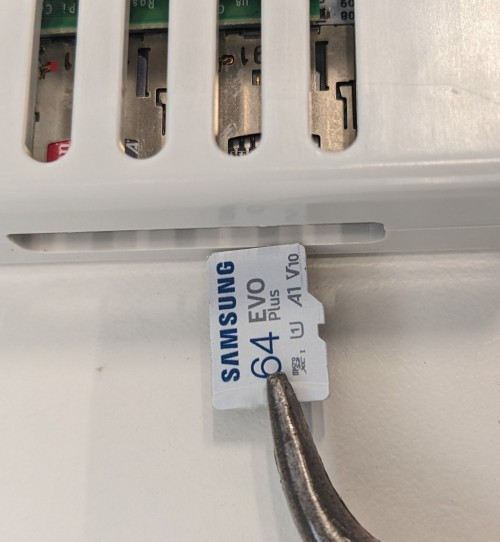
- Removing the SD card requires small pliers or tweezers. Tool-free removal is not possible.
- The system must be switched off and the Power Module disconnected from the power supply and removed.
If it is mounted on a rail, it is strongly recommended to dismantle it for this process.
Initial state:
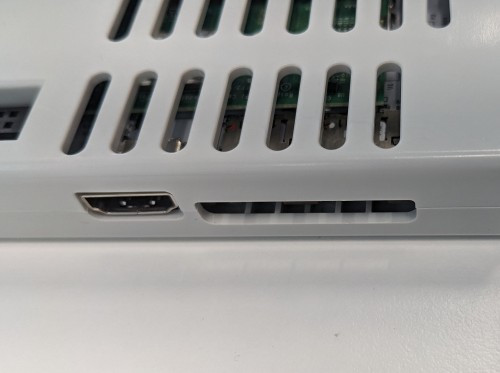
Gently press the SD card inwards to release its lock
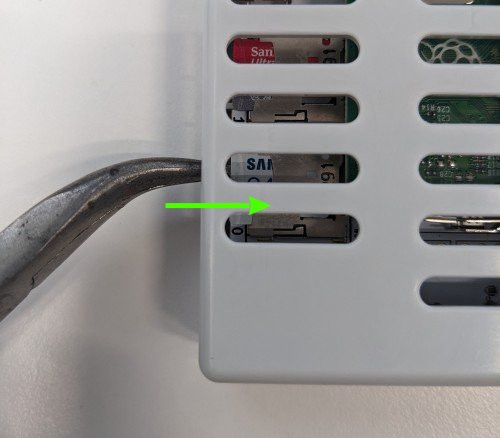
The situation should look like this
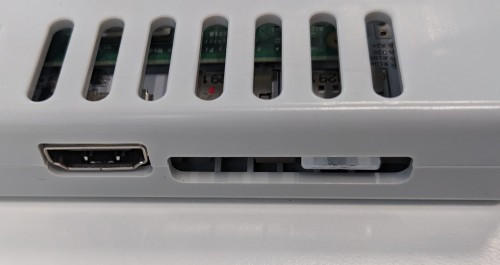
Remove the SD card with the pliers
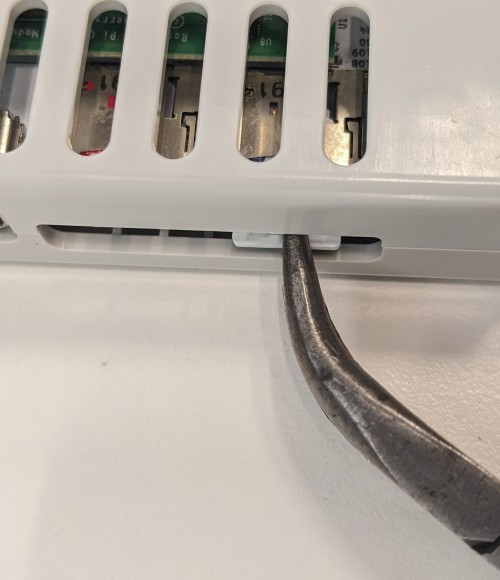
The SD card is now removed
Inserting SD cards
Follow the procedure in reverse order
Flashing
For Linux Users
The SDCard contains a “md” raid which may be detected by the OS.You should stop it before flashing the SDcard using
mdadm stop /dev/mdX.You should also stop the md-raid after flashing it (if it comes up).
Please note that some versions of md change the default number of the md-raid.
This breaks the boot as the default number must be md42.
It can be fixed using
mdadm --verbose --assemble --update=super-minor --run /dev/md42 /dev/sdaX.
Note
You must always flash both SDCards- Insert the SAMSUNG SDCard into the SDCard reader.
- (Backup the old data if needed)
- Start the Etcher, select the os image and the inserted SDCard
- Wait for the process to finish
- Insert the SANDISK SDCARD into the SDCard reader.
- (Backup the old data if needed)
- Start the Etcher, select the dummy image and the inserted SDCard
- Wait for the process to finish
- Insert the SDCards into the Mainboard
- The SAMSUNG card must be in SDCard Slot 0
- The SANDISK card must be in SDCard Slot 1
USB Bootloader (for experts)
The NOREYA NEXUS can also be flashed without removing the SDCards or an SDCard reader.
For this the official Raspberry Pi Usbboot is required.
- Install usbboot/rpiboot
- Start rpiboot
- Shutdown the Nexus using the power switch on the front
- Wait for the system to shutdown
- Connect the Mainboard using the USB Port C to your device
- Turn on the Mainboard using the power switch, press the bootloader/reset button on the Mainboard for 3 seconds until the sound appears and release it immideatley (holding it for 6 seconds will reset the bmc firmware)
- rpiboot should detect the device within 90 seconds
- The Mainboard resets after 30 seconds for 3 times (90 seconds in total) if it is not detected by rpiboot.
It will automatically boot back to normal if no connection could be established!
- The Mainboard resets after 30 seconds for 3 times (90 seconds in total) if it is not detected by rpiboot.
- The SDCard 0 should appear as disk on your device
- Flash it with Etcher like described above
- Start the Mainboard by turning the power switch back on after flashing
The second SDCard is usually unused after boot.
You can login via console to fix it:
sudo dd if=/dev/zero of=/dev/mmcblk1 bs=1M count=1
It will start syncing after a few minutes automatically.